1.2 Meetings
1.2.1 Teams
We can schedule a Teams meeting (or recurring meetings) through your outlook or the Teams app.
1.2.2 Zoom (template)
If we want to schedule a Zoom meeting (or recurring meetings) through your browser or the Zoom app. Below are our Zoom best practices and guidelines.
1.2.3 Making Scheduling Easier
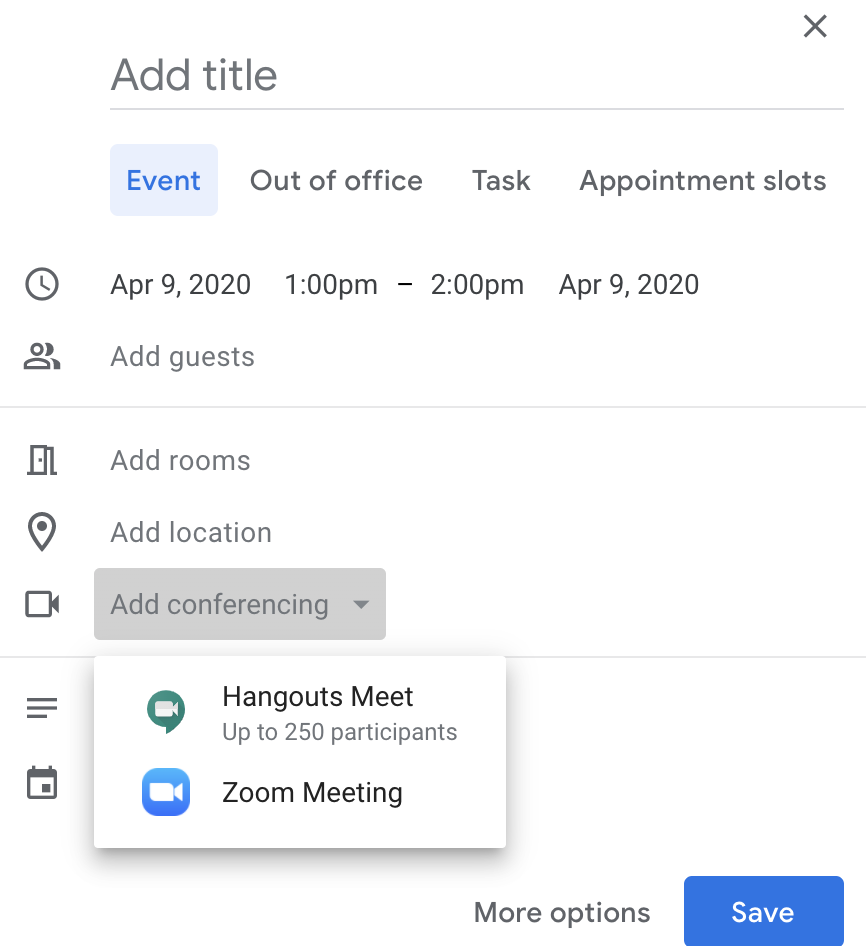
To make scheduling with Zoom easier, install Zoom for GSuite. Once synced with your Zoom account, it will show up as an option along with Hangouts under conferencing when you create a calendar invite. Once created, you will also be able to see the meeting on your Zoom account.

1.2.4 Being an Effective Communicator on Zoom…
…for meetings
Here are a couple of tips for getting the most out of virtual meetings:
Everyone on video: it’s nice to see everyone’s face instead of talking to black boxes. If your internet isn’t acting up, turn your video on to have a more engaging conversation.
Sharing screens: to keep everyone on the same page, have the presenter share their screen so all of the participants are looking at the same information to avoid any possible confusion. This is a good way to troubleshoot code, walk through documents, etc.
The new Zoom default is to only allow the host to screen share. To allow all participants to share their screens, go to your settings and under “who can share?” select “all participants.”

Note: If you aren’t comfortable changing this setting, instead turn on the ability to have co-hosts and in the meeting select the screen-sharers to be co-hosts.
Whiteboard: Zoom has a whiteboard feature that allows you to draw on your screen for everyone to see. To use this feature, share your screen and select “whiteboard” instead of a browser window.
Nonverbal communication: use the reactions feature in the bottom bar of your zoom meeting to react during a meeting (so far there is a clap and thumbs up option). You can also raise your hand in the meeting to signal that you have a question. To raise your hand, open the participant panel by clicking on participants in the lower bar and then click “raise hand” in the lower right hand corner (note: the host can’t raise their hand).
Making the most of virtual meetings:
Circulate as much as possible (agenda, slides, google docs, etc.) before the meeting so people have time to read/review them
If needed, schedule longer meetings to avoid feeling rushed and allow time to repeat things or deal with technical difficulties
Notify people ASAP if they are cutting out
Dial-in and use phone for audio if your internet connection is poor
Turn off videos if connection is poor
…for lectures
For teaching online courses, here are a couple additional tips. These are more geared towards keeping students engaged in a remote learning setting.
Zoom polls: you can enable “polling” for meetings and develop a list of preset questions to ask the group. For example, after introducing a topic, you can have students do a practice problem and respond to the poll with their answer. Instructions on how to do this here.
Zoom whiteboard: if you are used to drawing on the whiteboard in class, there is a virtual option for that through zoom! When sharing your screen, select whiteboard instead of your browser and draw away.
Breakout rooms: if your classes are more discussion-based, you can use the breakout room feature to break the class into smaller groups. The groups can either be automatically assigned randomly or manually assigned in specific groups ahead of time. More information on breakout rooms and pre-assigning rooms.
Record video: record lectures and post them online for students to refer to later. You could also record yourself walking through a homework or test problem for them to reference.
Pause for questions: since it will be harder to see students raise their hands, build in more breaks to pause for questions. You can also encourage students to either (1) add questions to the chat and pause once a couple of questions come in or (2) have them use the raise hand feature (see nonverbal communication above).